Introduction to Easy Homemade Bread
Baking bread at home is an incredibly rewarding experience that transcends the mere act of cooking. When you create easy homemade bread, you’re not just producing a staple food item; you’re crafting something deeply nourishing and satisfying. Imagine the warm, inviting aroma wafting through your kitchen, drawing in friends and family. That feeling of accomplishment when you pull a perfectly baked loaf from the oven? It’s unparalleled.
Why Bake Your Own Bread?
There are numerous reasons to choose homemade bread over store-bought options. For starters, you have full control over the ingredients. This means you can tailor the bread to suit your dietary needs or preferences. No preservatives, no mystery ingredients; just simple, wholesome elements like flour, water, yeast, and a pinch of salt.
Health-conscious individuals will appreciate knowing exactly what goes into their bread. According to research, bread bought from stores can often contain sugar, artificial flavorings, and preservatives. When you bake easy homemade bread, you can experiment with whole grains, seeds, or even herbs to enrich the nutritional value. Want to make it gluten-free or vegan? Absolutely possible!
Moreover, the cost-effectiveness of homemade bread shines through. With just a few basic ingredients, you can produce several loaves for the price of one premium loaf from the store. Plus, baking can be a therapeutic process. The act of kneading dough can be surprisingly meditative, allowing you to escape the hustle and bustle of daily life.
Lastly, let’s talk about the joy of sharing. Imagine slicing a fresh loaf and spreading it with your favorite toppings, like Turkey Bacon or a selection of deli meats such as Chicken Ham or even Beef. Sharing your creations can foster connections and create lasting memories.
Consider this: baking bread isn’t just a culinary task; it’s an art form that engages all your senses. So, why not grab your apron and dive into the world of easy homemade bread? Trust me; you won’t look back. If you’re wondering where to begin, you’re in the right place! Check out resources from The Bread Bakers Guild or King Arthur Baking for more inspiration and tips.
Ingredients for Easy Homemade Bread
Making easy homemade bread can be one of the most satisfying culinary experiences, especially when you watch it rise in the oven. Here’s what you’ll need to get started:
- Flour: All-purpose flour is your best bet, but you can mix in whole wheat for added flavor and nutrients. Around 4 cups should do just fine.
- Yeast: Instant yeast is fantastic for beginners because it doesn’t need proofing. One packet, typically about 2 ¼ teaspoons, will work well.
- Water: Use warm water (around 110°F) to activate the yeast. Approximately 1 ½ cups will be perfect.
- Salt: Don’t forget the salt! It enhances the flavor and controls yeast activity. A teaspoon is all you need.
- Sugar: A tablespoon of sugar helps the yeast bloom and adds a touch of sweetness.
- Olive Oil: Just a splash (about 2 tablespoons) incorporates a lovely richness into the dough.
By gathering these simple ingredients, you’re well on your way to baking up a loaf that will impress friends and family alike! Curious to dive deeper? Check out this guide to bread baking for some expert tips!
Step-by-Step Preparation for Easy Homemade Bread
Making easy homemade bread at home is not just about preparing a simple loaf; it’s about creating an experience filled with aromas that’ll fill your kitchen and the warmth of freshly baked bread! Let’s dive into each step of this delicious journey.
Activating the yeast
The first step in your quest for homemade bread is activating your yeast. Start by gathering the following ingredients:
- 2 ¼ teaspoons active dry yeast (about one packet)
- 1 cup warm water (about 110°F)
- 1 tablespoon sugar
In a small bowl, combine the warm water and sugar, then stir in the yeast. Let it sit for about 5 to 10 minutes. You’re looking for a frothy layer on top—this means your yeast is alive and ready to do its job! If it doesn’t froth, your yeast might be old or the water too hot.
Fun fact: According to the American Society of Baking, properly activating yeast is crucial for achieving that perfect rise.
Mixing the dough
Once your yeast is activated, it’s time to mix your dough. In a large mixing bowl, combine the frothy yeast mixture with:
- 2 tablespoons olive oil
- 2 teaspoons salt
- 3 cups all-purpose flour (or more, as needed)
Gently mix until a rough dough forms. The goal is to combine everything without being overly vigorous—think of it as a gentle dance rather than a wrestling match!
Kneading the dough
Now, let’s transfer that rough dough onto a floured surface for kneading. Knead it for about 8 to 10 minutes. You’re looking for a smooth and elastic texture. If it sticks to your hands or the counter, sprinkle a little more flour. Kneading strengthens gluten, which is essential for that chewy texture we adore in easy homemade bread.
First rise
Place your kneaded dough in a lightly greased bowl, cover it with a damp cloth or plastic wrap, and let it rise in a warm place. You want this first rise to last about 1 to 2 hours or until doubled in size. A fun tip: if you’re short on time, you can preheat your oven to about 200°F, turn it off, and then place the dough inside.
Shaping the dough
Once the dough has risen, punch it down (don’t worry, this is satisfying!) to release the air. Prepare for the fun part where you shape it into a loaf. Roll it into a tight cylinder or shape it as desired for your baking pan.
Second rise
After shaping, let the dough rise again for about 30 to 45 minutes. This second rise is crucial for flavor development, and it helps achieve a light texture in your easy homemade bread.
Baking the bread
Preheat your oven to 375°F while the dough is resting. When ready, place it in the oven for about 25 to 30 minutes. You’ll know it’s done when the top turns golden brown and sounds hollow when tapped!
Cooling and serving
Lastly, transfer your bread to a cooling rack. Allow it to cool for about 15 minutes before slicing—this is the hardest part! Slicing too soon can result in a gummy texture. Once cooled, serve it warm or toasted with your favorite spread or toppings, like turkey bacon or chicken ham.
Baking easy homemade bread can be a rewarding experience, filling your space with warm, inviting scents. So why not give this a try? Enjoy the process and share your amazing creation with friends—you might just inspire them to bake too!
For more bread-making tips, consider checking out resources from King Arthur Baking. Happy baking!
Variations on Easy Homemade Bread
Homemade bread is not only satisfying but also allows for creative variations to suit your taste and dietary needs. Here are a few delightful twists on easy homemade bread that you can try out.
Whole Wheat Bread
For a heartier loaf, consider using whole wheat flour. This nutty option increases fiber content and provides a richer flavor. Simply swap half of the all-purpose flour in your original recipe for whole wheat flour. You may need to add a few more tablespoons of water to get the right dough consistency. According to the Whole Grains Council, incorporating whole grains can reduce the risk of heart disease. Isn’t it wonderful to know your delicious loaf is also a health boost?
Herb-Infused Bread
If you’re looking to elevate the flavor profile, herb-infused bread might be just the thing. Adding fresh or dried herbs like rosemary, thyme, or basil can transform your easy homemade bread into a fragrant delight. Mix in about 1-2 tablespoons of your favorite herbs into the dough, or sprinkle some on top before baking for an aromatic crust.
Gluten-Free Options
For those avoiding gluten, don’t fret! You can still enjoy fresh, home-baked bread. Use a gluten-free flour blend and follow your regular bread recipe, but be sure to include a binding agent like xanthan gum to help with texture. Resources like the Gluten Intolerance Group provide valuable guidelines for gluten-free baking, ensuring you achieve the best results.
Experimenting with these variations can bring a new level of satisfaction to your baking routine. Which one will you try?
Cooking Tips and Notes for Easy Homemade Bread
Creating easy homemade bread can be a delightful experience. Here are some tips to make your baking journey smoother and more enjoyable:
-
Use Fresh Ingredients: Always check that your yeast is active. A simple way to test it is by adding it to warm water with a pinch of sugar. If it bubbles up, you’re good to go!
-
Knead with Love: Don’t rush the kneading process. Aim for at least 10 minutes. This helps develop gluten, resulting in a delightful texture. You can even put on your favorite playlist while you knead—who says bread-making can’t be fun?
-
Temperature Matters: The ideal environment for dough to rise is around 75-80°F (24-27°C). If your kitchen is cool, consider placing the dough in a warm spot, like near a sunny window or in the oven with just the light on.
-
Experiment with Flavors: Want to elevate your easy homemade bread? Try adding herbs, garlic, or even a sprinkle of cheese to the dough. These small changes can make your bread bursting with flavor.
Baking bread can be an incredibly satisfying hobby. By following these tips, you’ll be on your way to mastering this timeless culinary art. For additional resources, check out baking blogs like King Arthur Baking and BBC Good Food for more inspiration!
Serving Suggestions for Easy Homemade Bread
There’s something truly magical about the smell of easy homemade bread baking in your kitchen. Once you’ve mastered your loaf, it’s time to put it to good use! Here are some delightful serving suggestions that are not only quick but cater to various tastes.
Classic Toast
A slice of freshly baked bread is perfect for breakfast or brunch. Toast it up with a light spread of creamy butter or your favorite fruit preserves. If you’re feeling adventurous, try a drizzle of honey or a sprinkle of cinnamon for extra flavor!
Savory Sandwiches
Transform your loaf into satisfying sandwiches. Whether you’re adding turkey bacon and avocado for a hearty meal or layering chicken ham with fresh veggies, the options are endless. For a vegetarian twist, consider hummus with sliced cucumbers and tomatoes.
Dips and Spreads
Pair your homemade bread with delicious dips. Hummus, guacamole, or a vibrant salsa can elevate your snacking game. Check out this hummus recipe for a delightful twist.
Creative Crostinis
Slice your bread, toast it, and top it with a variety of ingredients like brie and figs or ricotta with avocado. Perfect for parties or a cozy evening in!
By exploring these suggestions, you’ll find that your easy homemade bread can be the star of every meal. Enjoy!
Time Breakdown for Easy Homemade Bread
When you’re ready to whip up some easy homemade bread, knowing the time commitment can help you squeeze it into your busy day!
Preparation Time
Getting started is a breeze. You’ll need about 10-15 minutes to gather your ingredients and mix them together. This is the fun part! Picture yourself adding flour, yeast, and a sprinkle of salt—it’s all about that hands-on experience.
Rising Time
Patience is key here! Allow your dough to rise for about 1-2 hours. This is the magical moment when your dough transforms, expanding and developing flavors. You can use this time to catch up on a quick show or even prep a delicious side.
Baking Time
Baking it will take roughly 25-30 minutes. The aroma that fills your kitchen as it bakes? Absolutely irresistible!
Total Time
In summary, from start to finish, this easy homemade bread requires approximately 2-2.5 hours of your time. Most of that time is just letting the dough do its thing, so don’t worry, you’ve got this! Check out resources like King Arthur Baking for tips and dough management advice. Happy baking!
Nutritional Facts for Easy Homemade Bread
When it comes to easy homemade bread, it’s not just about taste—understanding the nutritional aspects can enhance your baking experience. Here’s a quick breakdown to help you make informed choices.
Calories per slice
A single slice of easy homemade bread typically contains around 80 to 100 calories. This can vary based on the ingredients you choose, such as using whole grain flours which add more nutritional value.
Carbohydrates
Each slice packs in approximately 15-20 grams of carbohydrates, providing your body with the energy it craves. Whole grains can increase fiber, helping with digestion and keeping you satiated.
Protein content
You’ll find about 3-4 grams of protein per slice. While not a primary protein source, pairing your bread with toppings like Turkey Bacon or Chicken Ham can enhance its nutritional profile.
For more detailed nutrient breakdowns, check out reputable sources like Healthline and the USDA FoodData Central. By understanding what you’re eating, you can enjoy your delicious homemade bread even more!
FAQs about Easy Homemade Bread
When diving into the world of easy homemade bread, you might have a few questions. Don’t worry; it’s all part of the journey to becoming a confident home baker!
How can I ensure my bread rises properly?
To achieve a lovely rise in your bread, yeast activation is key. Make sure your water is warm (not hot!)—about 110°F (43°C) is perfect. A pinch of sugar will help kickstart the yeast’s action. Also, give your dough enough time to rest in a warm place; this allows it to rise effectively. A good tip is to cover it with a damp cloth to maintain moisture!
What can I do if my bread is too dense?
A dense loaf can be disappointing, but various factors might contribute to this. Check if:
- You’ve used the correct flour (too much whole wheat can weigh it down).
- Your yeast is fresh and activated properly.
- You thoroughly kneaded the dough, which helps develop gluten.
If you find this happening frequently, you might want to explore expert resources like the King Arthur Baking Company’s blog for additional troubleshooting tips.
How do I store homemade bread for freshness?
To keep your easy homemade bread fresh, store it in a cool, dry place, wrapped in a clean kitchen towel or in a paper bag. This allows it to breathe without getting stale. Avoid plastic wrap if you can, as it traps moisture and might cause mold.
Can I freeze homemade bread?
Yes! Freezing is a fantastic way to preserve your bread. Once it’s completely cooled, slice the loaf and wrap individual pieces in plastic wrap, followed by aluminum foil. This method helps maintain quality. When you’re ready to enjoy, simply thaw at room temperature or pop a slice in the toaster for a quick treat!
Baking at home provides joy and delicious results. If you run into any challenges, remember that practice makes perfect!
Conclusion on Easy Homemade Bread
In conclusion, making easy homemade bread is a rewarding experience that benefits both your taste buds and your wellness. With just a few basic ingredients, you can whip up a delightful loaf that fills your home with an inviting aroma. It not only serves as an excellent base for meals but can also be a charming gift for friends or family.
Remember, bread-making can be a therapeutic process, perfect for unwinding after a long day at work. For a deeper dive into the science behind bread-making, check out resources like the King Arthur Baking Company. So, why not gather your ingredients and get started on this baking adventure today? Your taste buds will thank you!
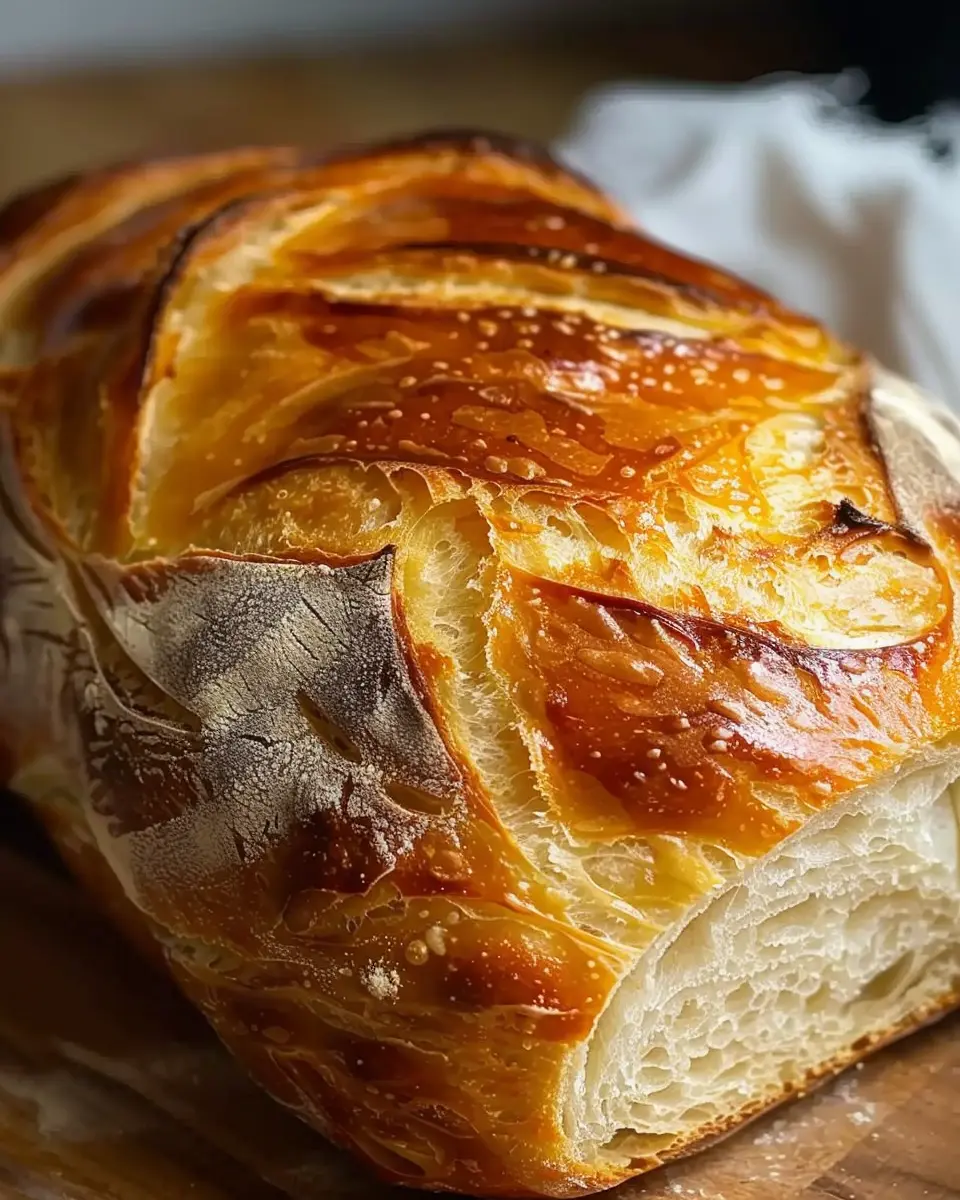
PrintEasy Homemade Bread: The Best Recipe for Soft, Warm Loaves

This easy homemade bread recipe yields soft, warm loaves that are perfect for any meal.
- Prep Time: 15 minutes
- Cook Time: 35 minutes
- Total Time: 1 hour 50 minutes
- Yield: 2 loaves
- Category: Breads
- Method: Baking
- Cuisine: American
- Diet: Vegetarian
Ingredients
- 4 cups all-purpose flour
- 1 tablespoon sugar
- 2 teaspoons salt
- 1 packet instant yeast
- 1 ½ cups warm water
- 2 tablespoons olive oil
Instructions
- In a large bowl, combine flour, sugar, salt, and yeast.
- Add warm water and olive oil to the dry ingredients.
- Knead the dough for about 10 minutes until smooth.
- Let the dough rise in a warm place until doubled in size, about 1 hour.
- Punch down the dough, shape it into loaves, and place in greased pans.
- Let the loaves rise again for about 30 minutes.
- Bake at 375°F (190°C) for 30-35 minutes until golden brown.
Notes
- For extra flavor, consider adding herbs or garlic to the dough.
Nutrition
- Serving Size: 1 slice
- Calories: 150
- Sugar: 1g
- Sodium: 200mg
- Fat: 3g
- Saturated Fat: 0.5g
- Unsaturated Fat: 2g
- Trans Fat: 0g
- Carbohydrates: 28g
- Fiber: 1g
- Protein: 4g
- Cholesterol: 0mg