Introduction to Earthquake Cake
What is Earthquake Cake and why is it a must-try dessert?
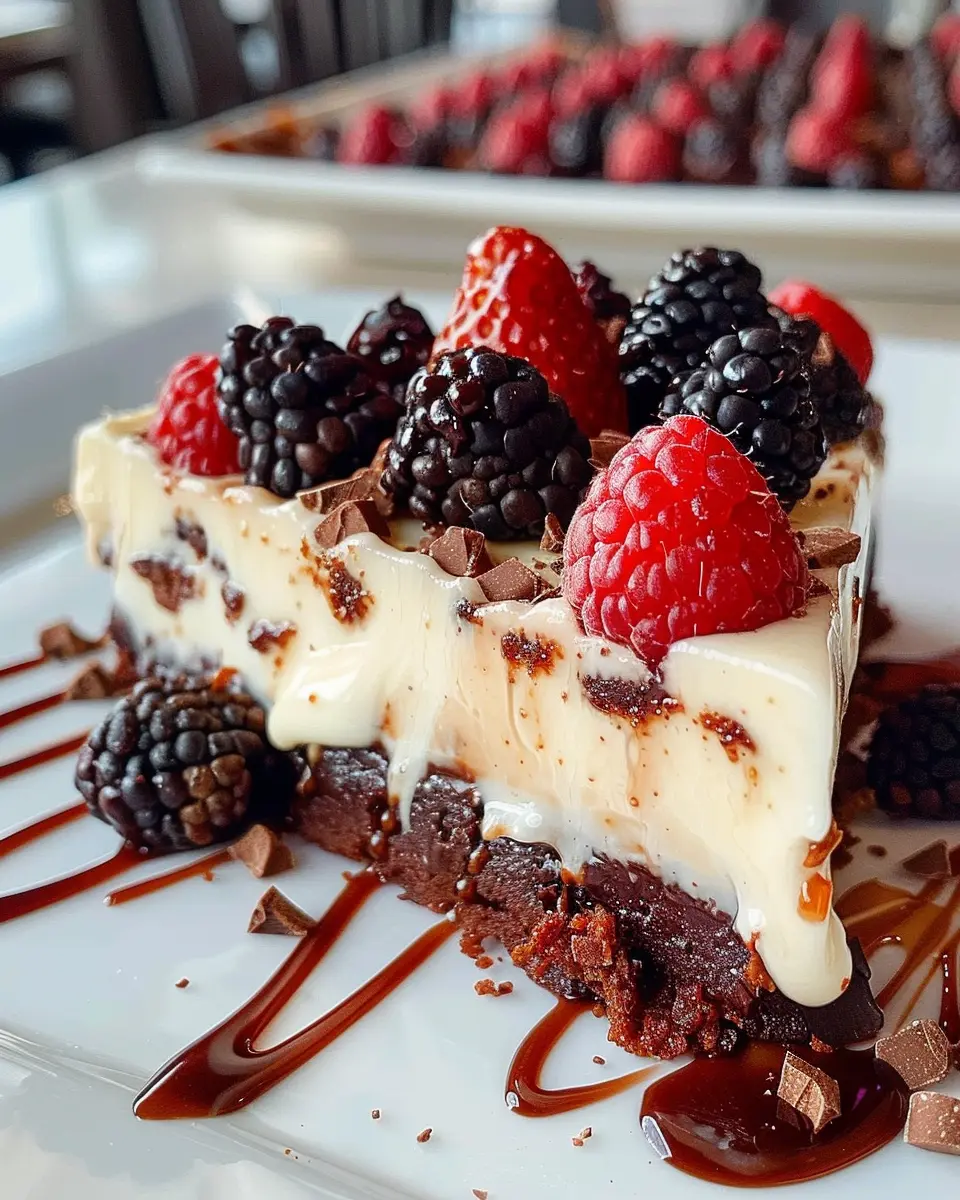
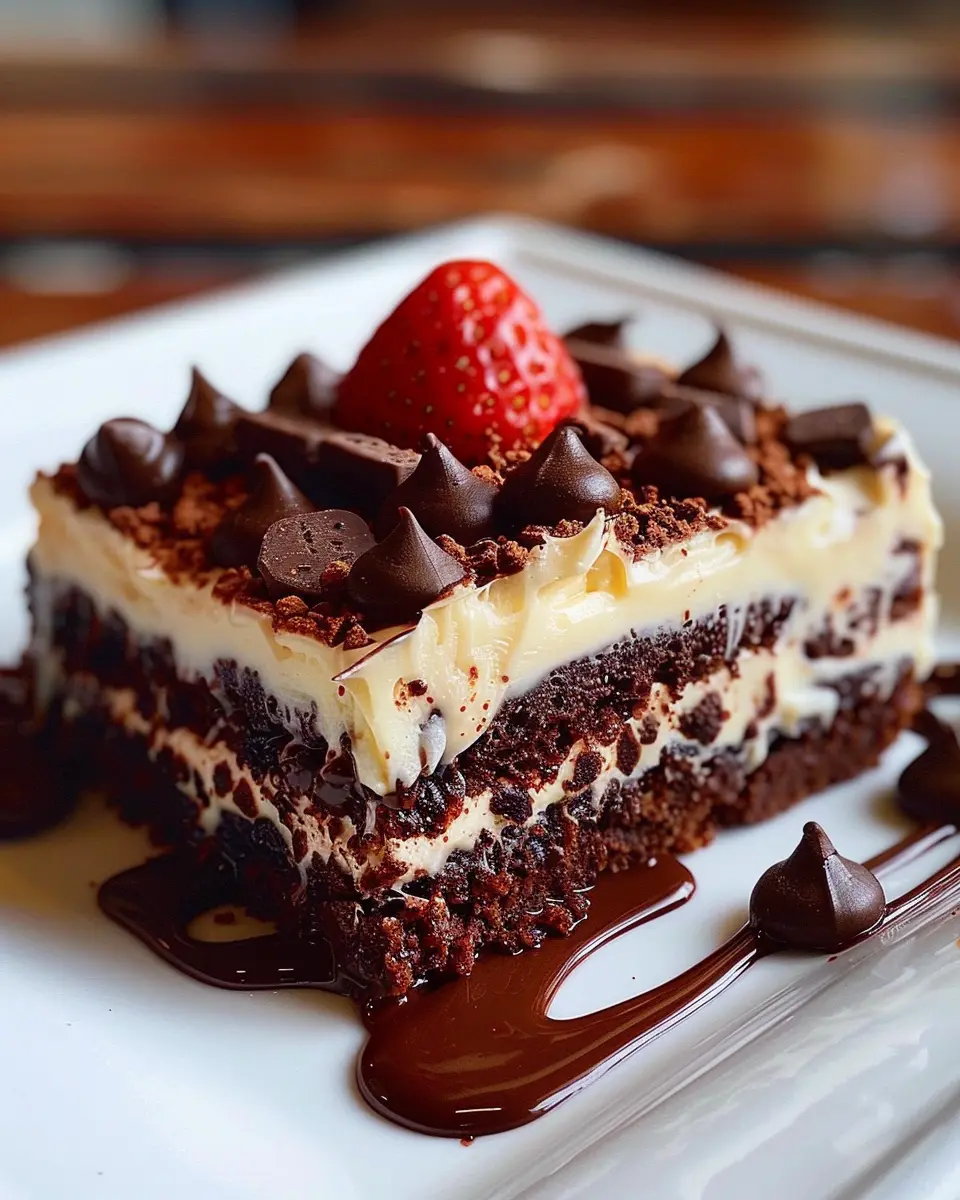
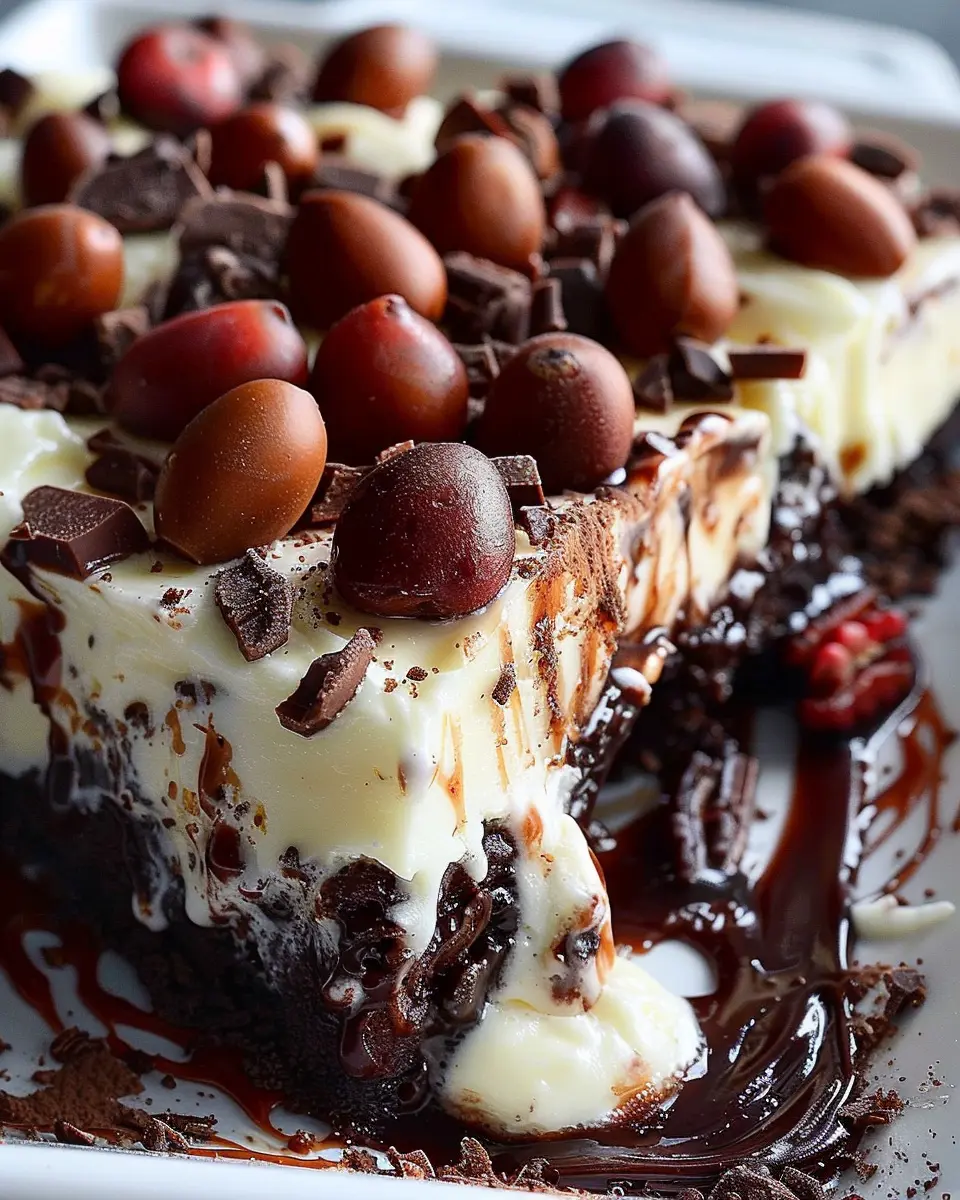
If you haven’t heard of Earthquake Cake, you’re in for a delightful treat! This unique dessert is a chocolate lover’s dream, combining the rich flavors of chocolate cake with a gooey cream cheese layer that gives it a spectacular “quaking” appearance. Imagine cutting into a slice and unveiling that tantalizing contrast—it’s no wonder this cake has earned its reputation as a showstopper at gatherings.
So, why should you add Earthquake Cake to your dessert repertoire? For starters, it’s incredibly easy to whip up, making it a fantastic option for both novice bakers and seasoned pros. All you need are basic ingredients like a boxed chocolate cake mix, cream cheese, and a few pantry staples. In just about an hour, you can have a warm, decadently rich dessert that’s sure to impress your friends and family.
The charm of Earthquake Cake lies not just in its taste but also in its texture. The cake itself is moist and tender while the cream cheese layer adds a creamy consistency that some might describe as velvety. The juxtaposition creates a delightful experience that tantalizes the taste buds. It’s versatile too; feel free to mix in your favorite nuts or even a sprinkle of toffee bits for an extra layer of flavor.
Additionally, if you’re in search of an easy dessert that requires minimal fuss but promises maximum flavor, this cake is a winner. The recipe calls for simple ingredients you probably have on hand or can easily find at your local grocery store—no need for elaborate shopping trips!
Curious about how to make this delightful dessert? You can find detailed recipes and variations on Earthquake Cake at trusted cooking sites like Epicurious or Food Network.
Now that you know a little more about this delectable treat, are you ready to dive in and give it a try? Your taste buds will thank you!
Ingredients for Earthquake Cake
Ready to dive into making an Earthquake Cake? This indulgent treat is not only delicious but also super simple to whip up, making it an ideal easy dessert for anyone looking to impress friends or family. Here’s what you’ll need for this decadent recipe:
- 1 cup chopped pecans or walnuts: These nuts add a fantastic crunch and flavor.
- 1 box German chocolate cake mix: Look for one with no preservatives or artificial flavors for a purer taste.
- 4 large eggs: Eggs help bind everything together, giving it that rich texture.
- 1 cup vegetable oil: This ensures your cake stays moist and fluffy.
- 8 oz cream cheese: For that creamy filling which adds a rich layer of flavor.
- 4 cups powdered sugar: Sweeten things up with powdered sugar to balance the richness of the cake.
- 1 cup shredded coconut: Adds a tropical twist that pairs beautifully with the chocolate.
As you gather these ingredients, consider playing around with your favorite nut options or even a splash of vanilla extract to enhance the flavor. For more baking tips, check out this helpful guide on ingredient substitutions.
This recipe not only satisfies your sweet tooth but is also a fantastic way to hone your baking skills, perfect for the busy young professional looking to unwind.
Preparing Earthquake Cake
There’s something truly special about an Earthquake Cake. It’s a delightful mix of flavors and textures, making it an irresistible treat for your dessert table. If you’re looking for an easy dessert that will impress your friends and family, you’ve hit the jackpot! Let’s break down the preparation into manageable steps so you can create this delicious cake with ease.
Gather Your Ingredients
Before you start, make sure you have everything on hand. Here’s what you’ll need:
- 1 cup shredded coconut (sweetened works best)
- 1 cup chopped pecans (or walnuts if you prefer)
- 1 box chocolate cake mix (your choice of brand)
- 4 large eggs
- 1 cup water
- 1/2 cup vegetable oil
- 8 oz cream cheese (softened)
- 1 cup powdered sugar
Having your ingredients ready will streamline the process, so take a minute to measure and prep them. If you’re not sure where to find some of these items, check online grocery stores or specialty food sites that often have great deals on bulk ingredients.
Preheat and Prepare Your Baking Dish
Now that you have your ingredients, it’s time to get started! Preheat your oven to 350°F (175°C). While it’s heating up, take a 9×13-inch baking dish and give it a good greasing. You can use non-stick spray or butter—just ensure it’s well-coated to prevent sticking. Lining the bottom with parchment paper can also help; just trim it to fit snugly.
Layer the Coconut and Pecans
Once your baking dish is prepped, it’s time to add the delicious layers. Begin by sprinkling the shredded coconut evenly over the bottom of the dish. Next, sprinkle the chopped pecans on top of the coconut. This combination not only adds a nice texture but will also create that delightful “earthquake” effect once the cake is baked.
Mix the Chocolate Cake Batter
Grab a large mixing bowl and add your chocolate cake mix, eggs, water, and vegetable oil. Mix it well until the batter is smooth. It’s perfectly fine if there are a few lumps—this isn’t a fine dining recipe. You are making an easy dessert, after all! A hand mixer will speed up the process, but a good ol’ whisk will work too if you’re in the mood to channel your inner baker.
Swirl the Cream Cheese Mixture
In a separate bowl, beat the softened cream cheese until it’s fluffy. Gradually add the powdered sugar and mix until smooth. Gently dollop this cream cheese mixture over the cake batter already in your baking dish. Then use a knife to swirl it into the batter—don’t stress about getting it perfect; the messier, the better! Those swirls lead to the gorgeous cracks that give this cake its name.
Bake to Perfection
Carefully slide your baking dish into the preheated oven and let it bake for about 40 to 45 minutes. You’ll know it’s done when a toothpick inserted in the center comes out clean or with just a few moist crumbs. Once out of the oven, let it cool for a while, then slice and serve. This cake can be enjoyed warm or cooled, topped with a dollop of whipped cream or a scoop of your favorite ice cream.
There you have it! You’ve just mastered the art of baking an Earthquake Cake, perfect for any occasion. Whether you’re hosting a casual dinner or celebrating a special event, this dessert is sure to be the star of the show. Remember, cooking is all about having fun—don’t be afraid to experiment and make it your own! For additional tips and variations, you can check out the Food Network for inspiration.
Happy baking!
Variations on Earthquake Cake
Coconut-free Earthquake Cake
If coconut isn’t your thing, don’t worry! You can still enjoy a delicious Earthquake Cake. Simply omit the coconut from the recipe. Instead, try adding an extra cup of chocolate chips or a swirl of creamy peanut butter for an equally delectable twist. You might opt for a layer of sliced bananas to bring in some natural sweetness. The great thing about cake is how flexible it can be—you can really experiment with flavor profiles.
Want to elevate the experience? Consider adding a drizzle of homemade caramel sauce. It’s an easy dessert enhancement that takes just minutes to make and transforms your cake into a diner-worthy treat. Looking for recipes for caramel? You can find a wealth of simple options on Food Network for a hassle-free addition.
Nut-free Options for Earthquake Cake
For those with nut allergies, creating a nut-free Earthquake Cake is a breeze! Simply exclude any nuts from the mix, and you’ll still end up with a rich, moist cake that’s bursting with flavors. Give it a try with some sunflower seeds or pumpkin seeds sprinkled on top for a bit of crunch without the nut risk.
By substituting almond flour with oat flour or an all-purpose flour blend, you’ll maintain that wonderful texture while keeping it safe for everyone. It’s amazing how easy it can be to adapt a beloved recipe to fit dietary needs! If you haven’t experimented with these flour alternatives before, check out King Arthur Baking for great insights on baking without nuts.
With these variations, you can enjoy this classic dessert no matter your dietary restrictions. Who knew an easy dessert could be this versatile?
Baking notes for Earthquake Cake
Tips for a gooey center
Achieving that wonderfully gooey center is essential for an unforgettable Earthquake Cake. Here are a few tips to get it just right:
- Underbake Slightly: Take the cake out of the oven when the edges are set but the center still looks a bit wobbly. It will continue to firm up as it cools.
- Use Room Temperature Ingredients: This helps the batter blend more smoothly, ensuring that the cream cheese and other ingredients create that luscious, gooey texture.
- Don’t Overmix: A gentle hand when mixing will keep the batter light, allowing the cake to rise beautifully while retaining that rich, moist center.
Avoiding clumping in the cream cheese mixture
Getting that easy dessert cream cheese layer smooth can be tricky. Here’s how:
- Soften Your Cream Cheese: Ensure your cream cheese is at room temperature for easy blending. Cold cream cheese can lead to lumps.
- Use an Electric Mixer: This will help you achieve a perfectly creamy consistency without the manual effort.
- Sift the Sugar: A quick sift of your powdered sugar can eliminate lumps before adding it to the mix.
With these tips, your Earthquake Cake is set to be a delightful hit! You can find more dessert ideas and baking techniques here. Enjoy the process and happy baking!

Serving suggestions for Earthquake Cake
Earthquake Cake is not just a dessert; it’s an experience that can be tailored to elevate any occasion. Here are a couple of delectable serving suggestions that will have your guests raving about this easy dessert!
Enjoy warm with ice cream
There’s something magical about warm cake and cold ice cream. When serving your Earthquake Cake, consider taking it out of the oven just a tad early, letting it cool for a few minutes, and then pairing it with a scoop (or two!) of vanilla or chocolate ice cream. The creaminess of the ice cream perfectly balances the rich, fudgy texture of the cake, creating a delightful contrast that’s hard to resist. Plus, it’s a perfect way to impress friends or family during a cozy dinner gathering.
Perfect paired with whipped cream
If you’re looking for a lighter touch, why not serve your Earthquake Cake with a dollop of freshly whipped cream? This combination complements the cake’s rich flavors while adding an airy feel. A sprinkle of chocolate shavings or a drizzle of caramel sauce can also enhance the presentation and add another layer of flavor.
For more serving ideas and inspiration on desserts like this, check out Food Network and Bon Appétit. Your Earthquake Cake is sure to make a lasting impression!
Tips for Making the Perfect Earthquake Cake
Creating the perfect Earthquake Cake isn’t just about following a recipe; it’s also embracing the joy of baking. Here are some tips to elevate your dessert to stellar status:
Choose Quality Ingredients
The foundation of any easy dessert lies in the quality of its ingredients. Opt for fresh eggs and high-quality chocolate. Believe it or not, these simple choices can enhance flavor dramatically. For the cream cheese layer, make sure it’s softened properly; it should be almost spreadable.
Don’t Rush the Mixing
Mixing your cake batter too much can lead to a dense texture. Aim for a balanced blend—just enough to combine, but not so much that your cake becomes tough. A gentle hand will yield a moist texture that melts in your mouth!
Experiment with Toppings
Once your cake is baked, think about adding creative toppings. Consider drizzling melted chocolate or a sprinkle of crushed nuts. Not only does this add texture, but it also makes your dessert visually appealing. Check out sites like Taste of Home for toppings inspiration.
Allow for Cooling
Although it’s tempting to dive into your delicious creation right away, allowing the Earthquake Cake to cool for a bit helps the flavors meld perfectly. This is often the difference between good and spectacular!
These tips will set you on the path to creating a remarkable Earthquake Cake that’s sure to impress your friends and family. What’s your secret baking tip?
Time details for Earthquake Cake
Preparation time
Getting started with your Earthquake Cake is simple and swift! Set aside about 20 minutes for preparation. This includes gathering your ingredients and mixing everything together smoothly. Trust me, you’ll love how easy this part is!
Baking time
Once your batter is ready, pour it into a prepared pan and pop it in the oven for about 30 to 40 minutes. You’ll want to keep an eye on it to ensure it doesn’t overbake—nobody likes a dry cake.
Total time
In total, you’re looking at around 1 hour from start to finish. Not too bad for a delicious, easy dessert that’s sure to impress your friends and family! For some inspiration on toppings or pairing ideas, check out Food Network’s dessert section for expert advice!
Nutritional Information for Earthquake Cake
When you’re indulging in an Earthquake Cake, it’s good to know what you’re treating yourself to. This delightful easy dessert is not just about taste; it packs a nutritional punch as well.
Calories
Each slice of this cake contains approximately 350 calories. While that sounds indulgent, remember that a little treat every now and then can fit nicely into a balanced lifestyle.
Sugar Content
With around 30 grams of sugar per slice, this cake satisfies your sweet cravings effectively. For a healthier balance, consider enjoying it alongside a cup of herbal tea or a fresh fruit salad to offset the sweetness!
Protein
You’ll find about 4 grams of protein per slice in Earthquake Cake. While it’s not a protein powerhouse, pairing it with a protein-rich side, like Greek yogurt, can help boost your overall intake.
For more detailed nutritional insights, feel free to explore sources like Healthline or NutritionData, which offer extensive breakdowns of various foods and ingredients. Embracing moderation is key—enjoy your easy dessert while keeping an eye on nutritional balance!
FAQs about Earthquake Cake
When it comes to baking, especially a delightful Earthquake Cake, you might have questions buzzing in your mind. Let’s address some of the most common ones!
Can I make Earthquake Cake ahead of time?
Absolutely! This easy dessert can be made a day or two in advance. Simply bake the cake, let it cool completely, and then store it in an airtight container at room temperature. Some folks even find that the flavors deepen and improve after sitting for a day. Just be sure to add any toppings, like whipped cream or berries, right before serving for that fresh touch.
What’s the best way to store leftovers?
If you find yourself with leftover cake (which is always a hopeful scenario), you’ll want to store it properly. Keep any uneaten Earthquake Cake in an airtight container at room temperature for up to 3 days. If you want to keep it longer, consider wrapping individual slices in plastic wrap and placing them in the freezer. Just remember to thaw it overnight in the fridge before enjoying again!
How do I prevent the cake from sticking to the pan?
To ensure your cake turns out beautifully and doesn’t stick, start by greasing your pan with butter or cooking spray. Adding a layer of parchment paper on the bottom can provide extra assurance. Dust the greased pan with flour, shaking out any excess, or you can use cocoa powder for chocolate cakes to avoid leaving a white residue. This little trick will help you achieve a gorgeous, flawless release!
For more baking tips, consider checking out reputable cooking sites like Joy of Baking or Serious Eats. Happy baking!
Conclusion on Earthquake Cake
In wrapping up our exploration of Earthquake Cake, I must say, this dessert truly stands out as an easy dessert that impresses all who try it. Its delightful combination of rich chocolate cake, melted cream cheese, and a crunchy topping makes every slice a treat for the senses.
Whether you’re hosting a gathering or just in the mood for something sweet, this cake is sure to be a hit. Plus, the joy of seeing that lovely “earthquake” crackle on the surface makes for an engaging storytelling moment when you serve it. Don’t hesitate to give it a try—you’ll create delightful memories with each bite!
If you’re interested, check out more about the psychology of comfort food on Psychology Today or explore other family-friendly recipes at BBC Good Food.
PrintEasy Dessert: Indulgent Chocolate Mousse with Turkey Bacon Twist

Indulge in a creamy and decadent chocolate mousse that surprises with a savory twist of turkey bacon.
- Prep Time: 20 minutes
- Cook Time: 15 minutes
- Total Time: 2 hours 35 minutes
- Yield: 4 servings
- Category: Dessert
- Method: No-bake
- Cuisine: American
- Diet: Gluten-free
Ingredients
- 8 ounces bittersweet chocolate
- 4 large eggs
- 1/2 cup heavy cream
- 1/4 cup sugar
- 1/2 teaspoon vanilla extract
- 4 slices turkey bacon
Instructions
- Cook the turkey bacon until crispy and chop into small pieces.
- Melt the chocolate in a double boiler and let it cool slightly.
- Whip the heavy cream until it forms soft peaks.
- In a bowl, whisk the eggs and sugar together until pale and creamy.
- Mix the melted chocolate into the egg mixture.
- Gently fold in the whipped cream and turkey bacon.
- Pour the mousse into serving dishes and chill for at least 2 hours before serving.
Notes
- For a richer flavor, use high-quality chocolate.
- Make sure the turkey bacon is very crispy to enhance the texture.
Nutrition
- Serving Size: 1 cup
- Calories: 300
- Sugar: 12 grams
- Sodium: 200 milligrams
- Fat: 21 grams
- Saturated Fat: 10 grams
- Unsaturated Fat: 8 grams
- Trans Fat: 0 grams
- Carbohydrates: 30 grams
- Fiber: 3 grams
- Protein: 5 grams
- Cholesterol: 100 milligrams