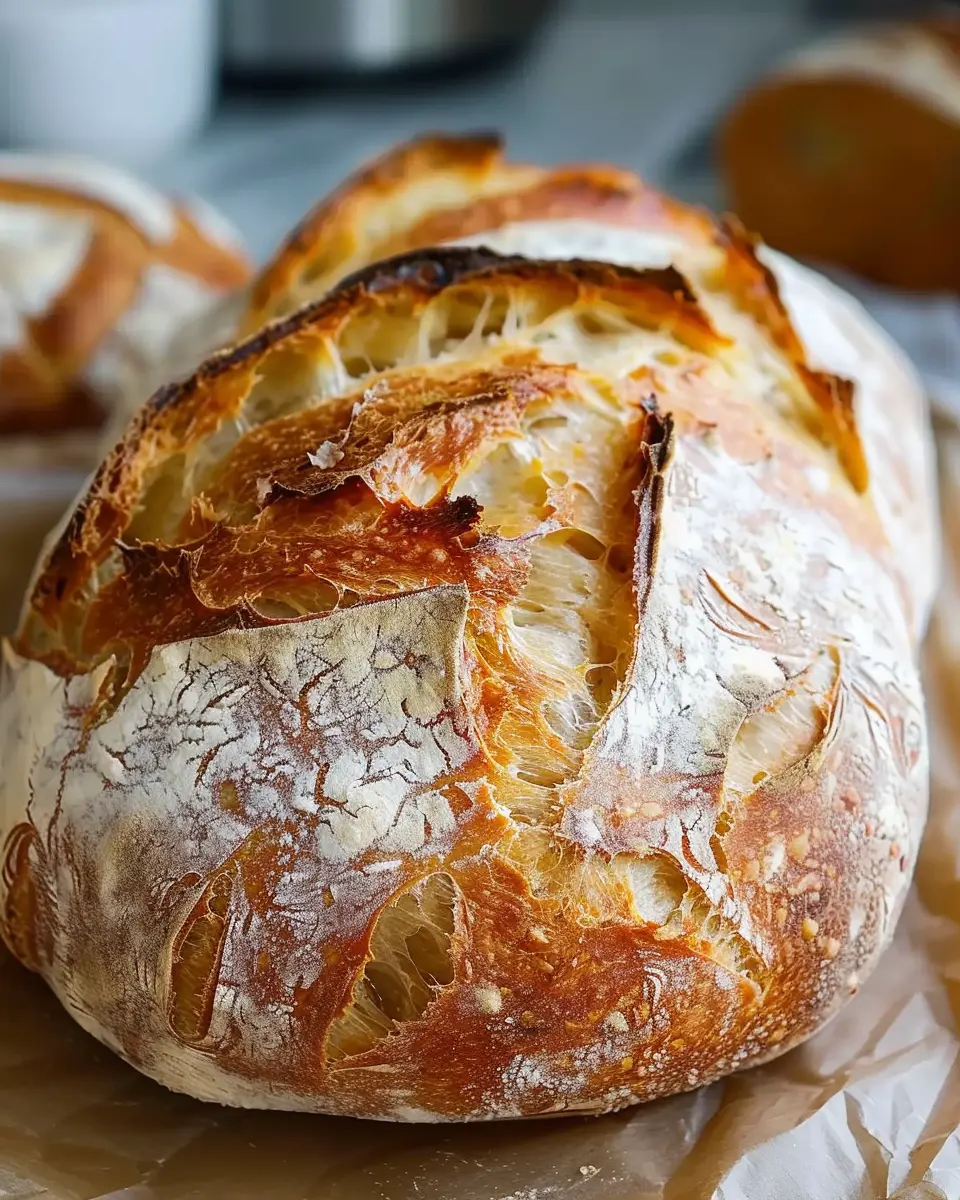
Introduction to Artisan Bread Recipe
When it comes to baking, few things are as satisfying as crafting your own artisan bread at home. The aroma that fills your kitchen as the bread bakes is simply irresistible! But why take the plunge into making this deliciously crusty loaf yourself? Well, there are several reasons.
Why make artisan bread at home?
-
Full Control Over Ingredients: When you bake bread at home, you decide what goes into it. This means you can opt for organic flour, incorporate whole grains, or even add unique flavorings like herbs or seeds. By using high-quality ingredients, your bread can taste fresher and more satisfying than store-bought options available at your local bakery.
-
Cost-Effective and Healthier: Have you ever noticed the price of artisan bread at gourmet markets? They can be pretty steep! Making your own can save you money and allow you to avoid preservatives commonly found in pre-packaged breads. As you might expect, baked goods generally contain fewer preservatives when made from scratch. According to the real bread campaign, homemade bread is not only more affordable but also health-conscious, ensuring that your loaf doesn’t have any unwanted additives.
-
Customizable: One of the most exciting aspects of an artisan bread recipe is the creative freedom it offers. Want to add roasted garlic? Go for it! Prefer a nutty texture with walnuts? That’s an option too. The canvas is yours, which means you can experiment and make a loaf that resonates with your flavor preferences.
-
Therapeutic and Enjoyable: Baking can be a calming experience, a meditative act that allows you to disconnect from the busyness of life for a little while. Kneading dough can be a great stress reliever, and watching your bread rise can be incredibly fulfilling. Plus, there’s something undeniably rewarding about serving fresh, homemade bread to family and friends.
If you’re ready to roll up your sleeves and create something delicious, this artisan bread recipe will guide you through the process. It’s easier than you might think, requiring just a few simple ingredients and a little time. By the end, you’ll have a loaf that will not only fill your home with warmth but also have your loved ones asking for seconds!
Ingredients for Artisan Bread
Essential Ingredients for a Perfect Loaf
Creating the ultimate artisan bread requires just a few essential ingredients that work harmoniously to produce a crusty, flavorful loaf. Here’s what you’ll need:
- Flour: Opt for high-quality all-purpose flour or bread flour. The protein content is crucial for developing that delightful gluten structure.
- Water: Use filtered water at room temperature. It’s the magic element that activates the yeast and hydrates the flour, creating that lovely dough texture.
- Yeast: Active dry yeast or instant yeast will do the trick. They provide the leavening power necessary for your artisan bread recipe.
- Salt: This ingredient enhances flavor and strengthens gluten. Sea salt or kosher salt works best, as they dissolve easily and distribute evenly.
- Optional Add-ins: Consider including herbs, seeds, or even sun-dried tomatoes to elevate your loaf. These not only add flavor but also texture.
The balance of these ingredients is key; experiment and discover your perfect mix. For more insights on flour types, check out King Arthur Baking Company for a deeper dive into the world of bread. Happy baking!
Step-by-Step Preparation of Artisan Bread
Making artisan bread at home is not just a culinary endeavor; it’s an experience that connects you to age-old traditions. With just a few ingredients and a bit of patience, you can achieve a loaf that rivals those found in your favorite bakery. Let’s dive into the preparation!
Measure and mix the dry ingredients
The first step to creating your perfect loaf is gathering the right ingredients. For this artisan bread recipe, you’ll need:
- 4 cups of all-purpose flour (and a bit extra for dusting)
- 2 teaspoons of salt
- 1 teaspoon of sugar
- 1 teaspoon of yeast (active dry or instant)
- In a large mixing bowl, whisk together the flour, salt, sugar, and yeast. Ensuring these ingredients are well combined sets the groundwork for consistent flavor and texture.
- Since the yeast is sensitive, keep it separate from the salt until you’re ready to add water. Salt can inhibit yeast growth if they come into contact too soon.
This step is crucial; it sets the tone for your entire bread-making experience. You can also check out King Arthur Baking for more insights on measuring flour accurately.
Add warm water and form the dough
Next up is the heart of the process—mixing in warm water to hydrate our dry ingredients. The water should be around 100°F (38°C) to activate the yeast without killing it.
- Gradually pour in 1 and 1/2 cups of warm water while stirring with a wooden spoon. Your aim is to combine everything until no dry flour remains.
- Once the mixture forms a shaggy mass, knead the dough gently in the bowl for a few minutes. It should be slightly sticky, but easy to handle. If it’s too wet, sprinkle in a little more flour as needed. Listening to your dough tells you when it’s ready.
This part is all about feeling and intuition. Messy hands are a great reminder of the fun involved in baking.
Let the dough rise and develop flavor
Now it’s time for a little magic! Cover the bowl with a clean kitchen towel or plastic wrap, and let the dough rise in a warm place for 12–18 hours. Yes, this long rise time is what develops that artisan bread flavor, so be patient.
Tips for perfect rising:
- Consider placing the dough in your oven (turned off) with the light on for a cozy environment.
- If you’re short on time, a faster rise can occur with a warmer environment, but you may lose some flavor.
During this time, the yeast works marvels, giving you a beautifully airy texture.
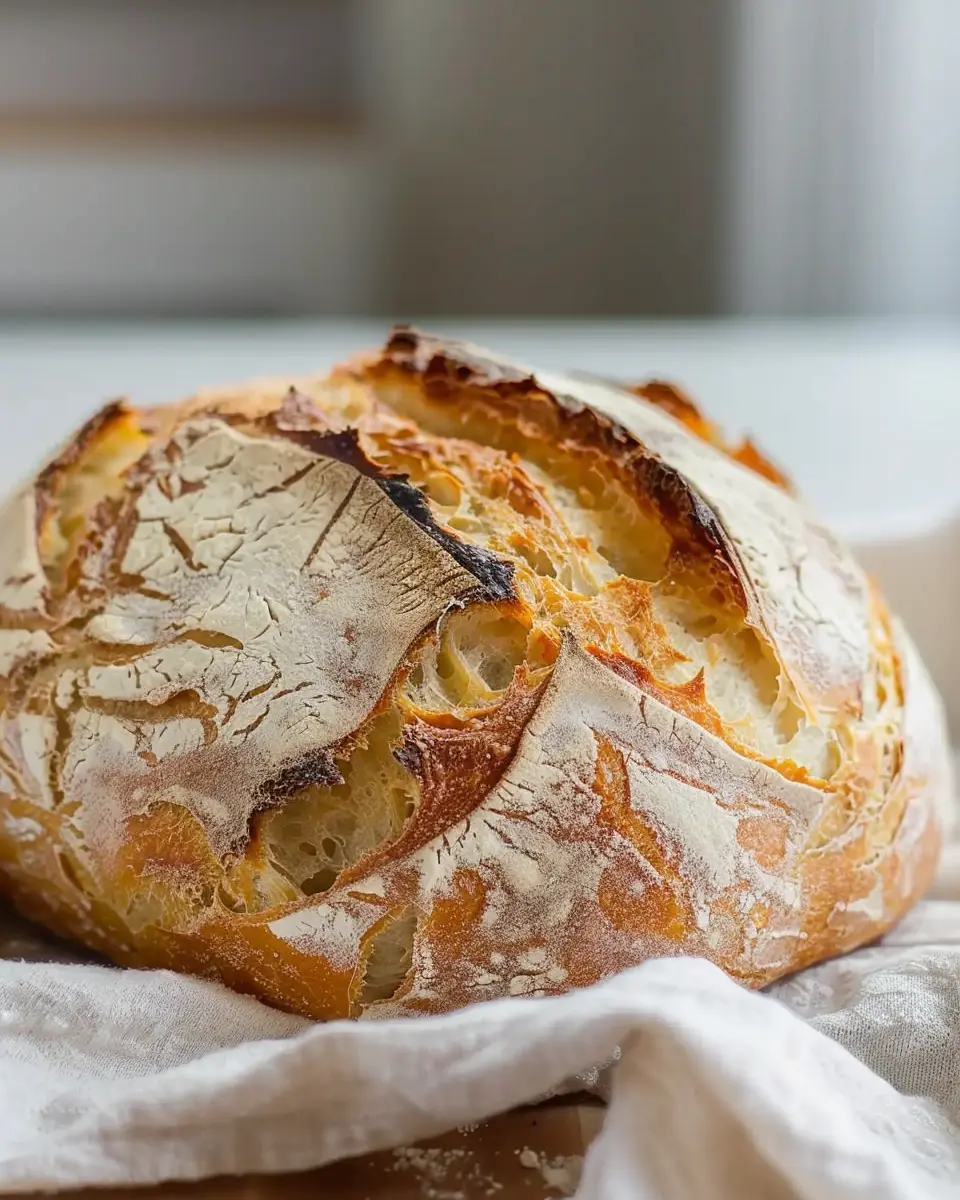
Shape the dough into a round loaf
Once your dough has roughly doubled in size, it’s shaping time!
- Lightly flour your countertop and gently turn the risen dough onto it. Be careful to preserve the gas bubbles that formed while rising.
- Fold the edges of the dough towards the center multiple times to create tension.
- Flip the dough seam-side down, and rotate it in a circular motion to form a nice round loaf.
For those who love visual guides, check out YouTube for video demonstrations on shaping.
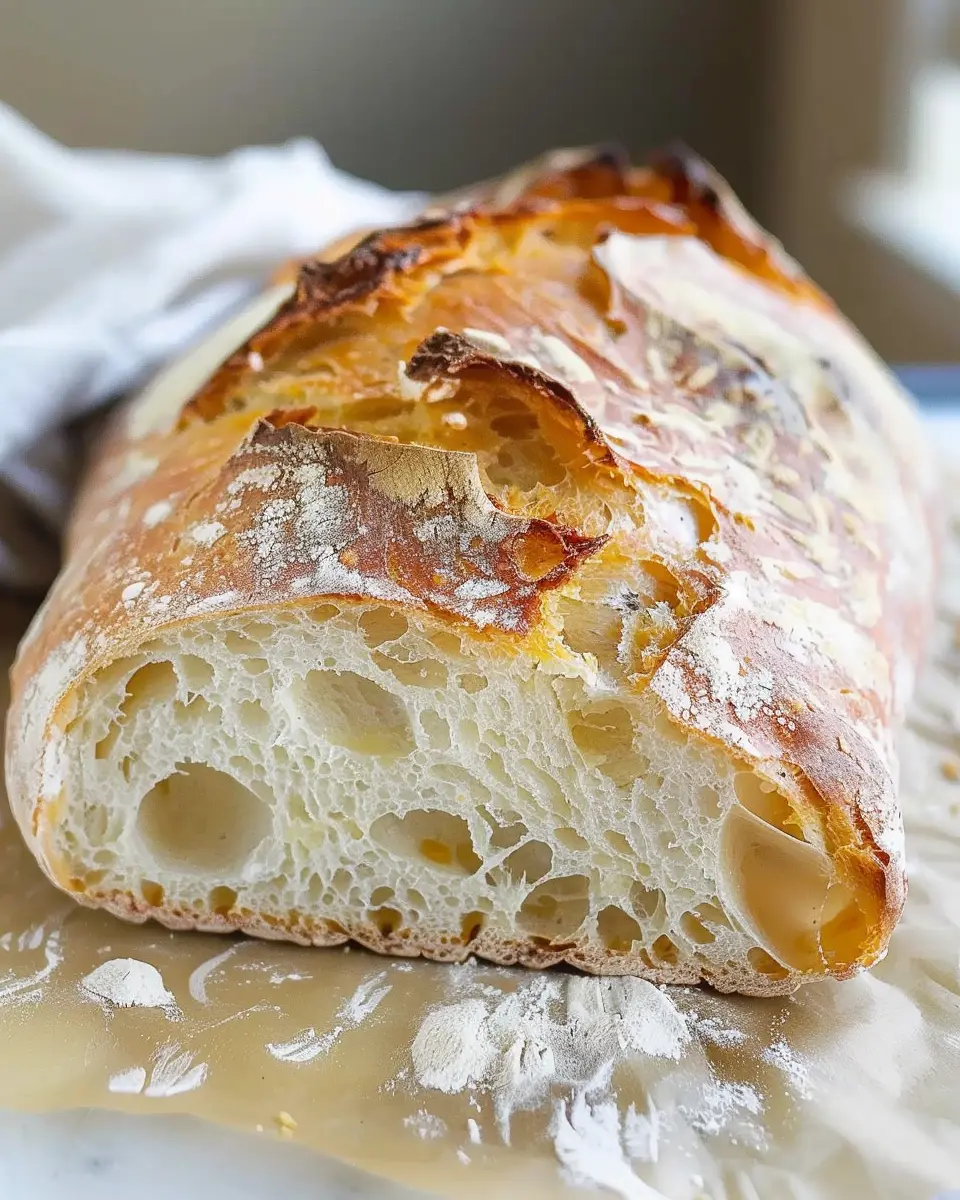
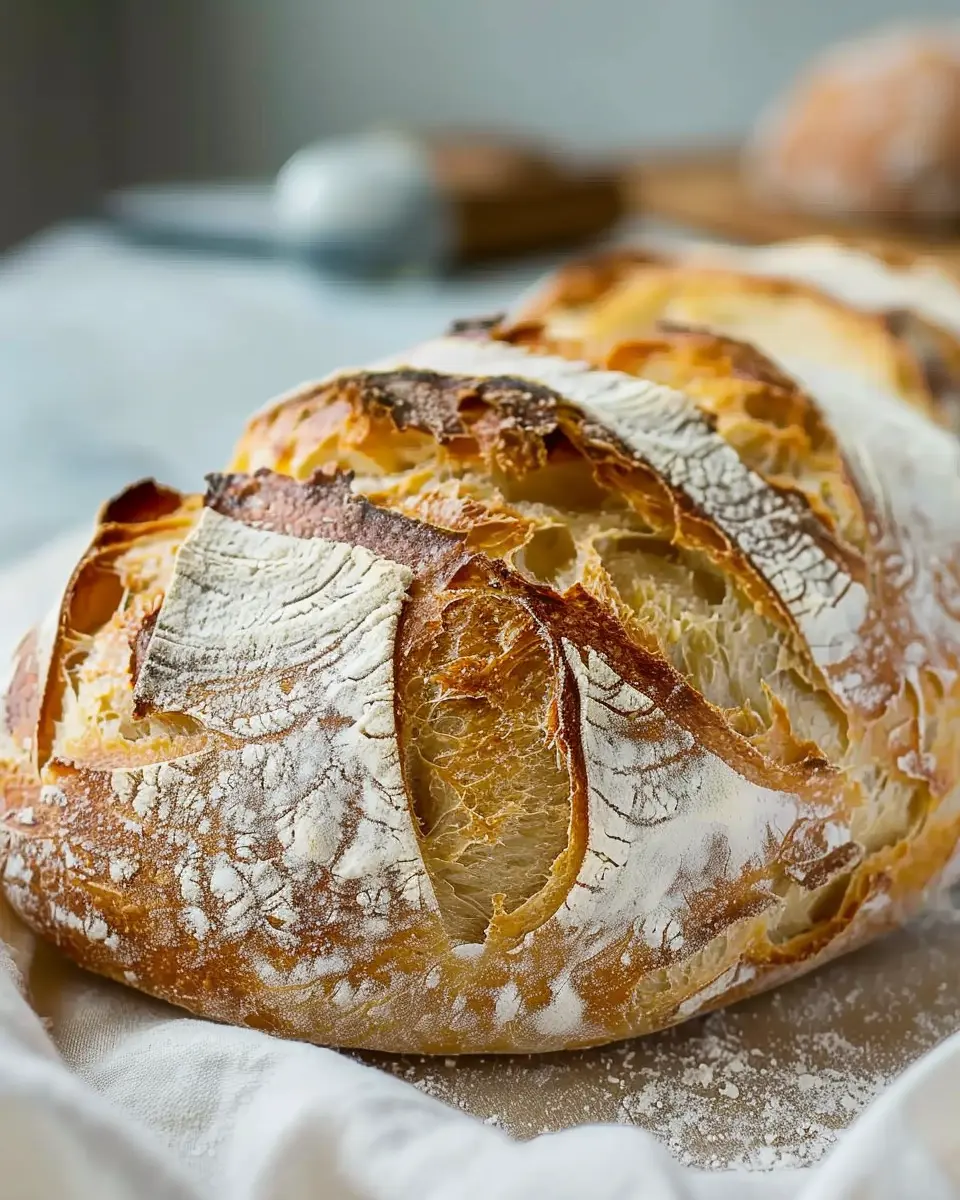
Prepare the oven and bake the bread
Before you bake, let’s preheat your oven to 450°F (232°C). While it heats, place your Dutch oven (or a covered baking dish) inside; this helps create a steamy environment for that crunchy crust.
- Carefully remove the hot Dutch oven and place your shaped dough inside. For an extra artisan touch, score the top with a sharp knife or razor blade.
- Cover the pot with its lid and bake for 30 minutes. Then, remove the lid and continue baking for another 15 minutes until the crust is golden brown.
The aroma filling your kitchen will be irresistible, and you’ll know you’re on your way to mastering your artisan bread recipe.
Baking bread at home is a fulfilling experience; not only do you get to enjoy the result, but you also learn to appreciate the art of cooking. So roll up your sleeves, get kneading, and savor each moment of this delicious process!
Variations on Artisan Bread
Breathing a little creativity into your artisan bread recipe can transform the humble loaf into something spectacular. Let’s dive into a couple of delicious variations that will not only impress your guests but also offer a delightful twist for your taste buds.
Adding herbs and spices
Imagine breaking into a warm loaf infused with the earthy aroma of fresh herbs. A sprinkle of rosemary or thyme can elevate your bread from simple to sublime. Here’s how to do it:
- Choose your herbs: Fresh herbs like basil or oregano work beautifully, while dried spices such as garlic powder or smoked paprika add warmth.
- Mix them in: Add about 1-2 tablespoons of minced fresh herbs or 1 teaspoon of dried spices during the initial mixing stage of your bread dough.
This method not only adds flavor but can also provide a gorgeous aesthetic. Think about pairing it with a flavorful olive oil for dipping. If you’re interested in exploring more on how herbs can enhance culinary dishes, check out this resource on culinary herbs.
Incorporating cheese and olives
For a Mediterranean twist, try adding cheese and olives to your dough. This variation is perfect for a snack or an accompanying side dish.
- Cheese selection: Consider using sharp cheddar, crumbled feta, or even gooey mozzarella. About 1 cup of cheese works well.
- Olive options: Kalamata or green olives can introduce a savory complexity. About ½ cup, chopped, is sufficient.
Fold the cheese and olives into your dough during the last few minutes of kneading. Not only will this create pockets of melted goodness, but it will also impress anyone who takes a bite. Serve it alongside a fresh salad or soup for a complete meal experience. Want to learn more about the combination of flavors? Check out this article on cheese pairings.
These variations on your artisan bread recipe can turn your baking into an artistic endeavor. Happy baking!
Cooking Tips and Notes for Artisan Bread
Crafting your own delicious artisan bread is an enjoyable and rewarding experience. Here are some helpful tips to elevate your baking game:
Start with Quality Ingredients
It’s crucial to use high-quality flour that’s rich in protein, as it helps create that lovely crust and chewiness we love in artisan bread recipes. Look for bread flour instead of all-purpose flour for better results.
Knead with Patience
Kneading not only develops gluten for that perfect texture but also allows you to connect with your dough. If you’re short on time, consider using the stretch-and-fold technique, which requires less effort and still yields great results.
Embrace Hydration
Don’t shy away from moisture! A wetter dough can mean a more open crumb and better flavor. As you practice, you’ll find that learning to manage hydration will transform your artisan bread game.
Preheat and Steam
Ensure your oven is properly preheated for a great rise and crust. Adding steam during the first part of baking (like placing a pan of boiling water in the oven) will mimic a professional baking environment and enhance your crust.
Experiment and Enjoy
Baking is all about experimentation. Feel free to incorporate herbs, seeds, or even swap in some turkey bacon or chicken ham for a unique twist. Each loaf you make will teach you something new.
For more in-depth tips, check out the King Arthur Baking website for expert advice and inspiration!
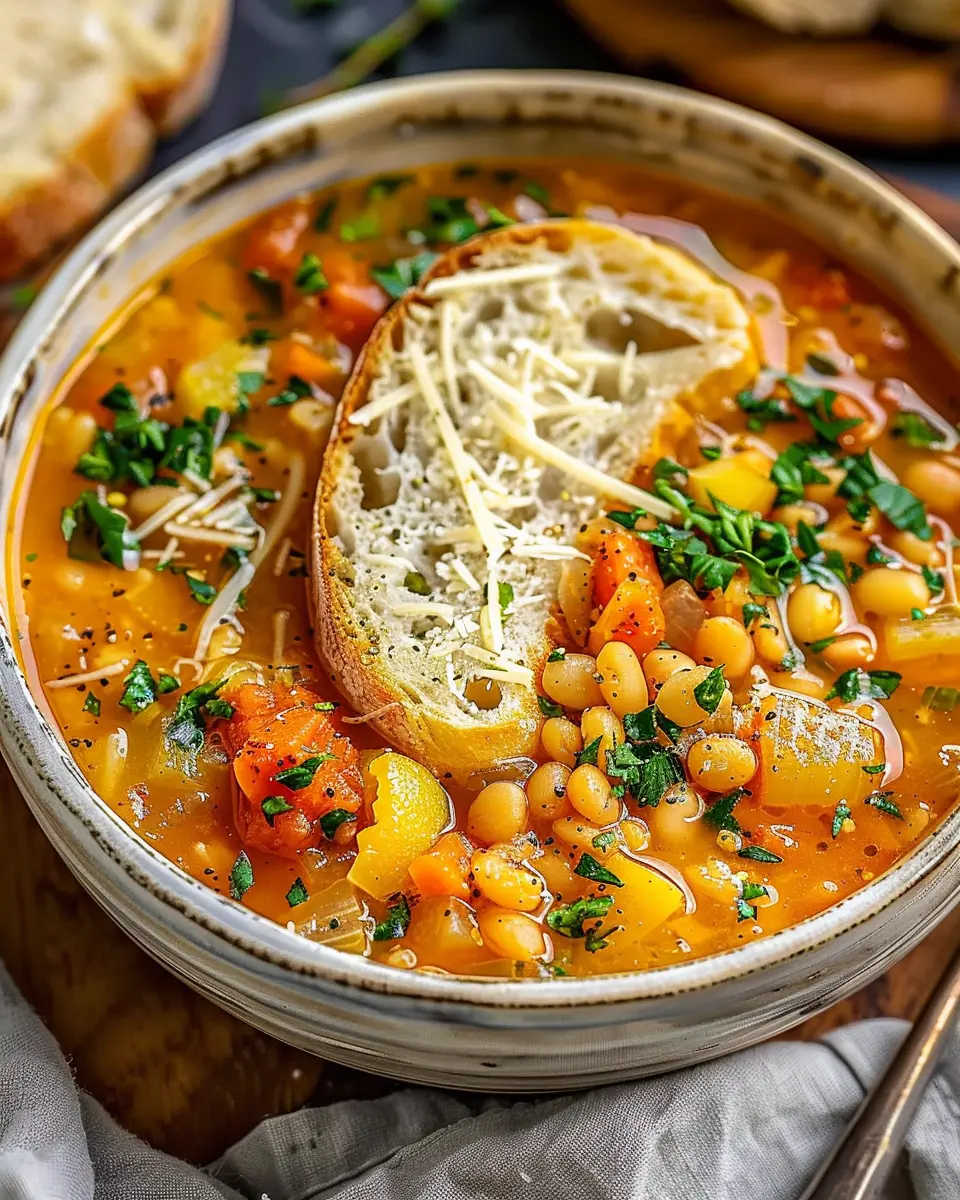
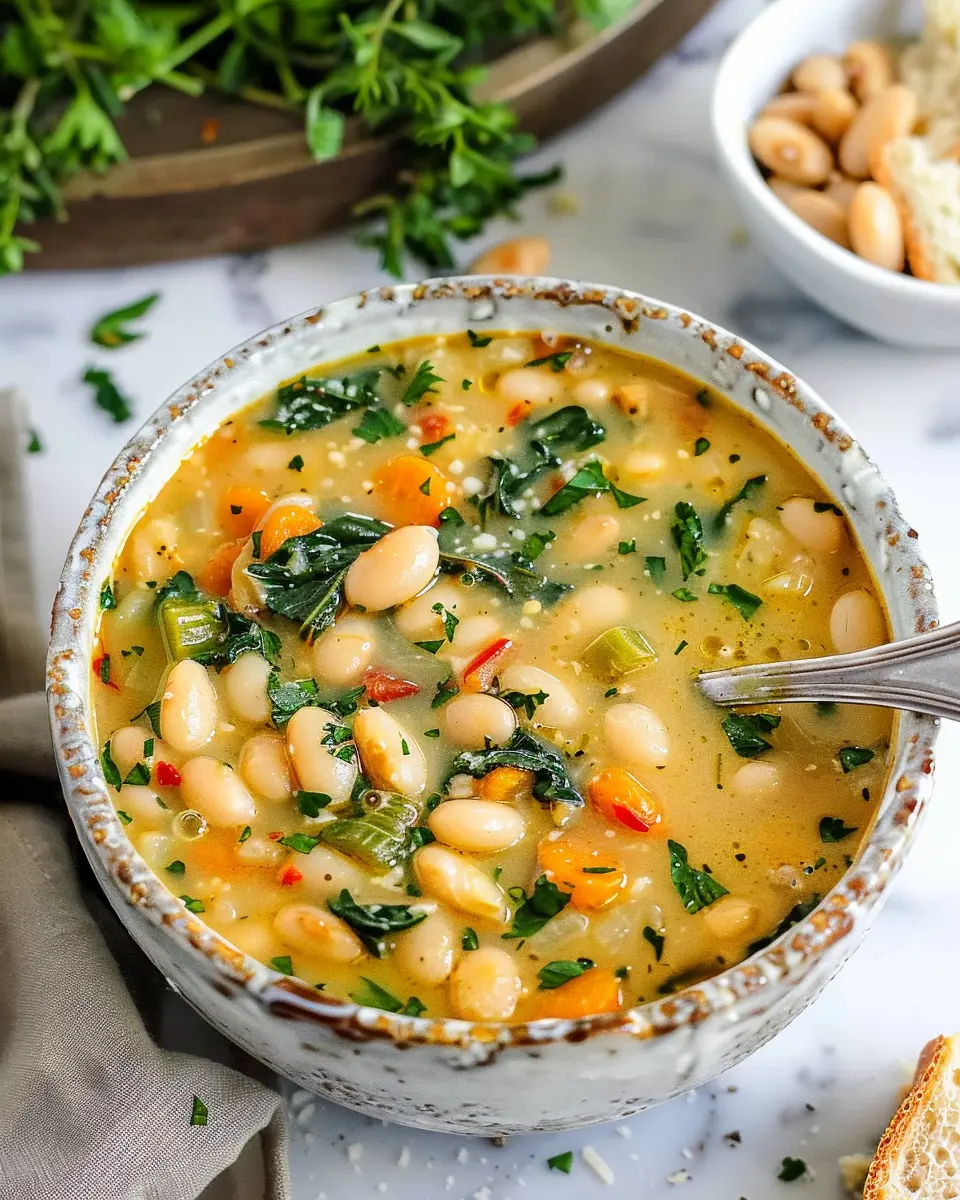
Serving Suggestions for Artisan Bread
Pairing with spreads and toppings
There’s something uniquely satisfying about finding the perfect spread or topping to complement your artisan bread recipe. Here are some delightful pairings to consider:
- Cream cheese and fresh herbs: A twist of flavor that’s creamy and aromatic.
- Avocado and a sprinkle of sea salt: Simple yet rich, providing that perfect creamy texture.
- Hummus with sliced cucumbers: A fresh and crispy option that’s both healthy and satisfying.
- Turkey bacon or chicken ham with mustard: This combination offers a savory punch, ideal for breakfast or brunch.
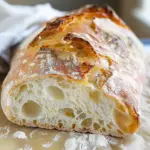
Enjoying artisan bread fresh from the oven
There’s truly nothing like tearing into a loaf of artisan bread right as it comes out of the oven. The aroma fills your kitchen, and each slice captures a perfect blend of crusty and chewy. If you have the luxury of enjoying it fresh, try eating it plain to savor the nuances of the bread itself. Pair it with a warm beverage like herbal tea or freshly brewed coffee for the ultimate experience.
Remember, artisan bread is a canvas—get creative! You can read more about creative topping ideas on Epicurious.
Time Breakdown for Artisan Bread
When you’re diving into this artisan bread recipe, understanding the time commitment is key. Here’s a breakdown to help you manage your baking adventure:
Preparation Time
Getting started is straightforward, with about 20-30 minutes needed for mixing your ingredients and kneading the dough. Make sure to follow each step carefully!
Rising Time
The dough needs time to work its magic, so allow at least 1-2 hours for the first rise. If you want to enhance the flavor, consider a longer cold fermentation in the fridge overnight. This is the time to relax, maybe read a book or catch up on your favorite podcast.
Baking Time
Once risen, your bread will bake for around 30-40 minutes. Keep an eye on that golden-brown crust; it’s a sign of deliciousness!
Total Time
In total, you’re looking at approximately 2-3 hours, including rising and baking, plus any additional time you spend on that cold fermentation.
This timeframe can vary based on your environment and the exact recipe you use, but don’t worry! The end result will be well worth it. For more tips on artisan bread techniques, check out resources like King Arthur Baking or Breadtopia. Happy baking!
Nutritional Facts for Artisan Bread
Calories per slice
When you indulge in a slice of homemade artisan bread, you’re looking at approximately 80-100 calories per slice, depending on the specific recipe and ingredients used. This makes it a relatively guilt-free option when compared to store-bought varieties packed with preservatives. If you’re monitoring your caloric intake, consider savoring your bread with a spread of avocado or a light drizzle of olive oil for a healthier treat.
Protein content
Each slice of your delightful artisan bread recipe typically contains about 3-4 grams of protein. While it’s not a significant source, pairing your slice with protein-rich toppings like Turkey Bacon or a spread of nut butter can elevate your snack or meal.
Carbohydrate details
In terms of carbohydrates, a slice of artisan bread usually offers around 15-20 grams. Most of these are complex carbohydrates, providing you with lasting energy throughout your busy day. For those curious about further nutritional insights, sites like MyFitnessPal provide comprehensive breakdowns of homemade foods!
By understanding these nutritional facts, you can make informed choices about how to enjoy your artisan bread while balancing it with other healthful foods. Happy baking!
FAQs about Artisan Bread
Can I use whole wheat flour for this recipe?
Absolutely! Using whole wheat flour in your artisan bread recipe can add a wonderful nutty flavor and a richer nutritional profile. However, keep in mind that whole wheat flour absorbs more water than all-purpose flour, so you may need to adjust the liquid a bit. Start with 75% whole wheat and 25% all-purpose flour for a nice balance. Interested in learning more about the benefits of whole grains? Check out this detailed resource from the Whole Grains Council.
How do I store my artisan bread?
To maintain that delightful crust and soft crumb, storing your artisan bread properly is key. Here are some simple tips:
- Cool Completely: Always let your bread cool completely before storing it. This prevents moisture buildup.
- Paper Bag: Store the bread in a paper bag at room temperature for up to three days. This keeps the crust nice and crispy.
- Freezing: If you want to keep it longer, slice the bread and wrap it tightly in plastic wrap, then place it in a freezer bag. It can last up to three months in the freezer.
What can I use instead of a Dutch oven?
No Dutch oven? No problem! You can still bake delicious artisan bread using alternative methods. Consider these options:
- Baking Stone: Place your dough on a preheated baking stone. Ensure you have steam in the oven by placing a shallow pan with hot water at the bottom.
- Heavy Baking Sheet: Upside-down, a heavy baking sheet can mimic the enclosed environment of a Dutch oven.
- Cast Iron Skillet: Another great alternative is a cast iron skillet with a lid, if you have one.
With these tips, you’ll be well-equipped to tackle your artisan bread recipe like a pro! Have more questions? Feel free to drop them in the comments!
Conclusion on Artisan Bread Recipe
In wrapping up this artisan bread recipe, it’s clear that baking your own bread is immensely rewarding. Not only do you get to enjoy the delightful aroma filling your kitchen, but the satisfaction of pulling a fresh loaf from the oven is unmatched. This recipe, with its straightforward steps, is perfect for those new to baking.
Don’t hesitate to experiment with flavors—adding herbs, cheese, or even your favorite nuts can elevate your loaf to new heights. Remember, practice makes perfect! So, the next time you’re looking for a simple yet impressive dish, dive into this bread-making adventure. For more expert tips, check out resources like King Arthur Baking for guidance on perfecting your craft. Enjoy your baking journey!
Printartisan bread recipe: the best homemade loaf you’ll love
Learn how to make a delicious artisan bread at home with this simple recipe that yields a crusty loaf with a soft, airy interior.
- Prep Time: 20 minutes
- Cook Time: 35 minutes
- Total Time: 2 hours 30 minutes
- Yield: 1 loaf
- Category: Bread
- Method: Baking
- Cuisine: European
- Diet: Vegetarian
Ingredients
- 3 cups all-purpose flour
- 1 ½ cups warm water
- 2 teaspoons salt
- 1 teaspoon sugar
- 2 teaspoons active dry yeast
Instructions
- In a large bowl, mix warm water, sugar, and yeast. Let it sit for 10 minutes until bubbly.
- Add flour and salt to the mixture, stirring until a dough forms.
- Knead the dough on a floured surface for about 10 minutes until smooth.
- Place the dough in a greased bowl, cover, and let it rise for 1-2 hours until doubled in size.
- Punch down the dough, shape it into a loaf, and place it in a greased loaf pan.
- Let it rise again for about 30 minutes.
- Bake in a preheated oven at 450°F (232°C) for 30-35 minutes or until golden brown.
- Cool on a wire rack before slicing.
Notes
- Make sure your water is warm, not hot, to activate the yeast.
- You can add herbs or cheese for extra flavor.
Nutrition
- Serving Size: 1 slice
- Calories: 150
- Sugar: 1g
- Sodium: 320mg
- Fat: 1g
- Saturated Fat: 0g
- Unsaturated Fat: 0g
- Trans Fat: 0g
- Carbohydrates: 30g
- Fiber: 1g
- Protein: 5g
- Cholesterol: 0mg